
According to the Celiac Disease Foundation, an estimated 1% of the population globally has Celiac disease, an autoimmune disease that requires a strict gluten-free diet. In addition, an estimated 11-25% of US households eat a gluten-free diet. At Tales of a Mountain Mama, we want everyone to be able to experience the outdoors and to make it as accessible as possible. We put together a 3-day gluten free camping meal plan to make your next camping trip easier!
To make managing camping food easier, prep as many ingredients ahead of time as possible. Have everything pre-chopped, pre-measured, and labeled to make everything run smoothly at camp. It can be helpful to have a checklist and menu printed out for each day ahead of time.
All the recipes in this post come from The Easy Camp Cookbook and Camping with Kids Cookbook, both by Amelia Mayer. While the entire cookbooks are not gluten-free, they contain many more GF recipes along with vegetarian, dairy-free, and nut-free labeled recipes to help you prepare for your next camping trip.
This post may contain affiliate links. As an Amazon Associate and member of other affiliate programs, if you purchase something through one of these links and use the discount codes provided, we may earn an affiliate commission at no cost to you.
All products and brands recommended are hand selected by our team, so thank you for supporting us by clicking through!
Day 1: Lumberjack Breakfast, Campfire Hash, Walking Tacos
Lumberjack Breakfast
1 (16-link) package breakfast sausages
1 (15oz) bag frozen hash browns
1 cup chopped green bell peppers
1 cup chopped onions
8 eggs
1 (8oz) package shredded cheddar cheese
salt and pepper
Salsa, for topping (optional)
Guacamole, for topping (optional)
Campsite Instructions:
- Prepare 4 large squares of tinfoil and lightly spray them with cooking spray. Fold the edges up slightly to form a bit of a bowl shape so the eggs are contained when you add them.
- Place 4 sausages in each piece of foil.
- Add a handful of the hash browns (leftover potatoes work well, too), ¼ cup of bell peppers, ¼ cup of onions, and 2 eggs. Add salt and pepper to taste.
- Wrap up the packet, making sure each side is closed securely. Double wrap with tinfoil.
- Cook over fire or on the grill for 15-20 minutes, turning each packet once.
- After 15 minutes, open the packet to check that the sausage is cooked through. Add about 2 oz cheddar cheese to each packet, close them up, and cook for 5 more minutes to melt the cheese.
- Remove from heat and let cool slightly.
- Top with salsa and guacamole (if using), and eat right out of the foil.
Campfire Hash
2 tablespoons olive oil
1 large onion, chopped
2 garlic cloves, minced
1 (16oz) bag frozen cubed hash browns
1 pound smoked kielbasa or another sausage of your choice
1 (15oz) can whole kernel corn, drained
1 (4oz) can chopped green chiles
Salt and black pepper
Ketchup or hot sauce, for topping (optional)
Campsite Instructions:
- Heat the olive oil in a large skillet over medium heat. Add the onion and cook until tender. Add the garlic and stir to combine.
- Add the hash browns. Cook, uncovered, for about 20 minutes, stirring occasionally until tender.
- Add the kielbasa, stir, and cook for another 10 minutes until browned.
- Add the corn and chiles. Stir and cook for another 5 minutes or until heated through. Add salt and pepper to taste.
- Serve with ketchup or hot sauce (if using).
Walking Tacos
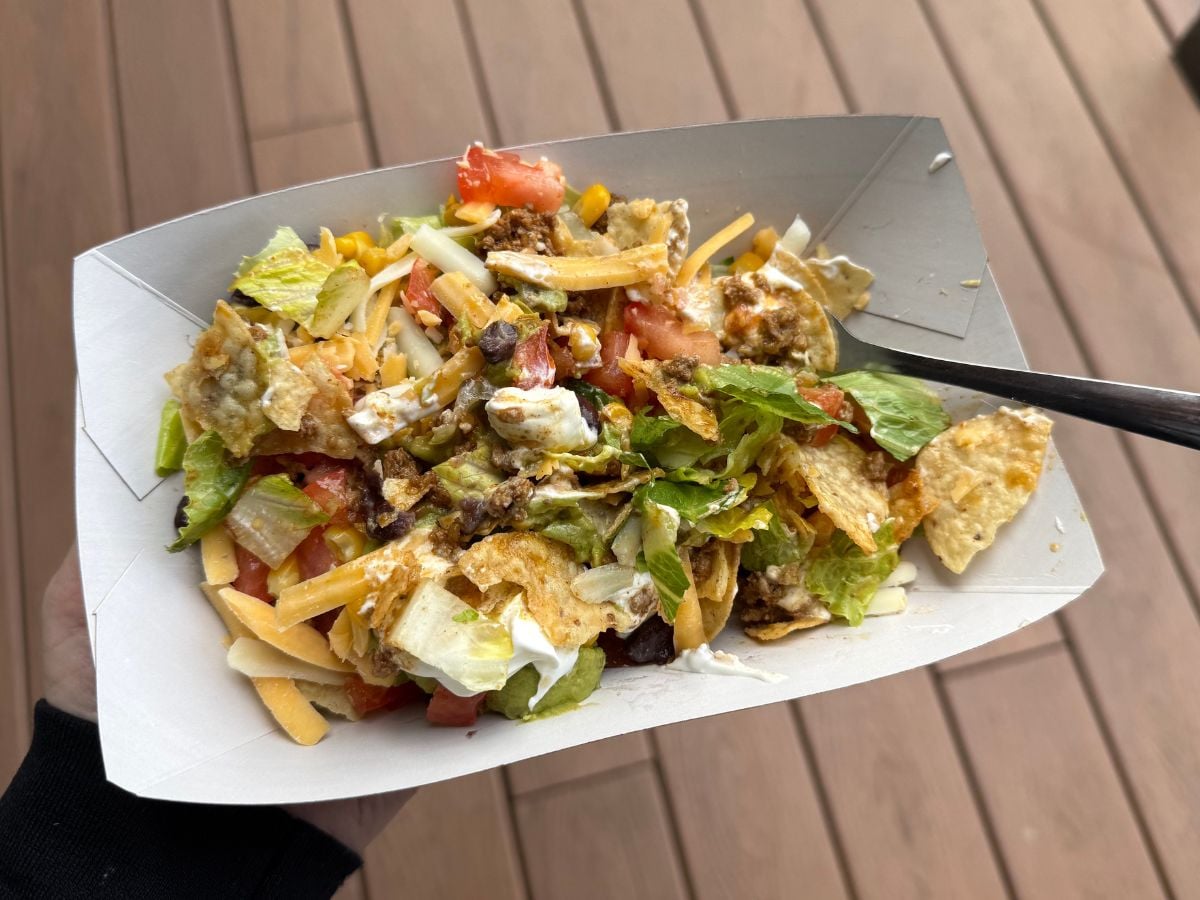
1 pound ground beef
1 tablespoon chili powder
1 teaspoon ground cumin
¾ teaspoon salt
½ teaspoon dried oregano
½ teaspoon garlic powder
¼ teaspoon black pepper
1/3 cup chopped onion
½ cup tomato sauce
¼ cup water
½ cup Cheddar cheese
1 medium tomato, chopped
½ cup lettuce
4 (1 oz) bags corn chips
Guacamole (optional)
Prep at Home:
- Brown the beef. Add the chili powder, cumin, salt, oregano, garlic powder, and pepper and still well.
- Add the onions and stir well.
- Reduce the heat to medium and add the tomato sauce and the water. Stir to combine. Cook for 7-8 minutes until slightly thickened.
- Let the beef cool, then pack it in a large resealable plastic bag or container to transport to the campsite.
Campsite Instructions:
- Shred the Cheddar cheese, chop the tomatoes, and shred the lettuce. Divide the toppings evenly into 4 to 6 resealable plastic bags.
- Keep everything refrigerated until ready to cook, or keep in a cooler if you are traveling to your camping area.
- At the campsite: Warm the beef and onion mixture over a fire or camp stove in a medium-size pan.
- Crush the corn chips slightly before you cut open the bags.
- Add the beef and toppings right to the chip bag and eat!
Day 2: Bacon and Egg Cheesy Grits, Chicken Fajita Foil Packets, Sweet and Sour Salmon
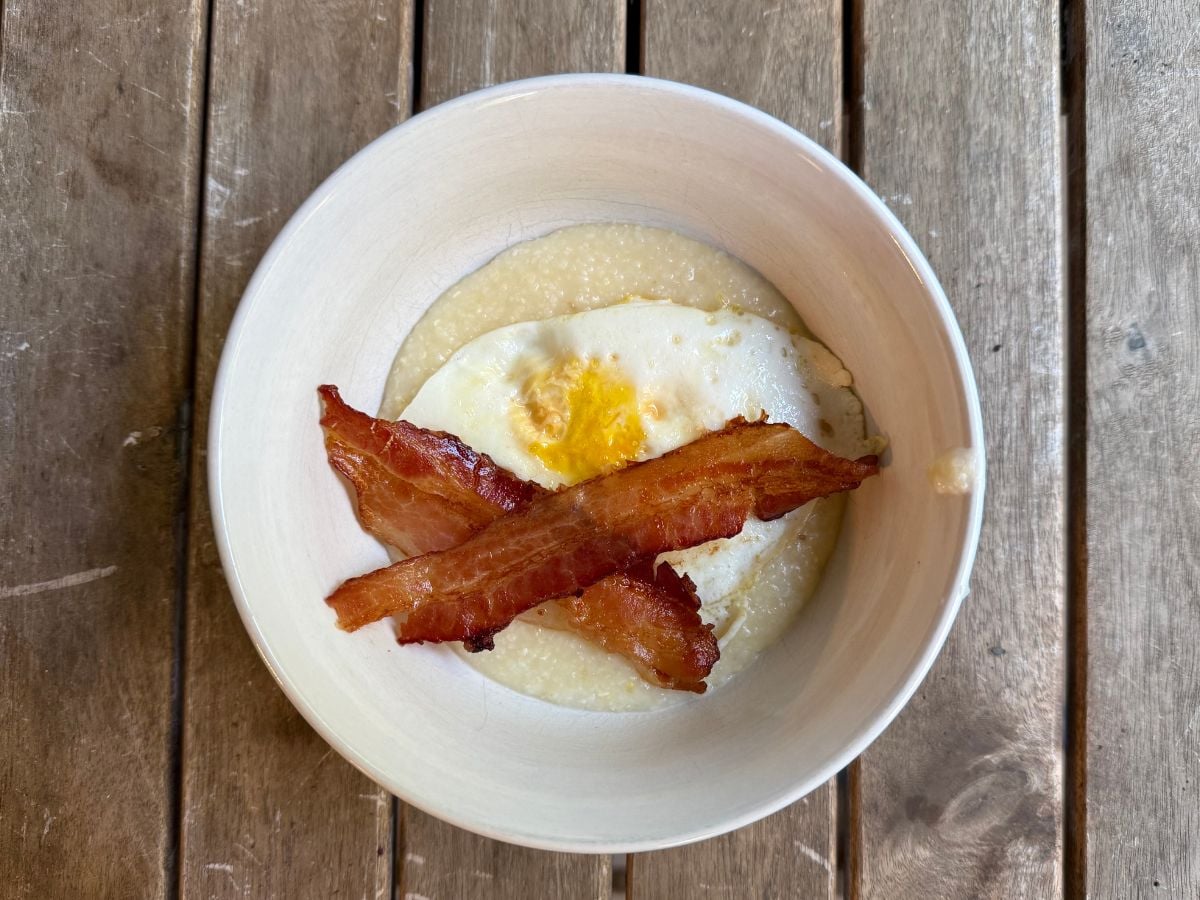
Bacon and Egg Cheesy Grits
8 strips bacon, cooked and crumbled
1 cup shredded cheddar cheese
1 cup quick gluten-free grits
salt and pepper
4 eggs
Prep at Home:
- Cook the bacon, then cool and crumble it.
- Pack the Cheddar cheese in a container or small resealable plastic bag and pack the bacon in a separate resealable plastic bag.
- Store both bags in the refrigerator, then transfer to a cooler for transporting to the campsite.
Campsite Instructions:
- In a large pot, cook the grits according to the package directions (it should take about 5 minutes).
- Meanwhile, fry the eggs in a skillet as desired so they are ready when the grits are.
- As soon as the grits thicken, remove from heat and mix in the shredded cheese and salt and pepper to taste.
- Divide the grits among four bowls or plates and add a fried egg on top of each.
- Divide the crumbled bacon evenly among the bowls and serve.
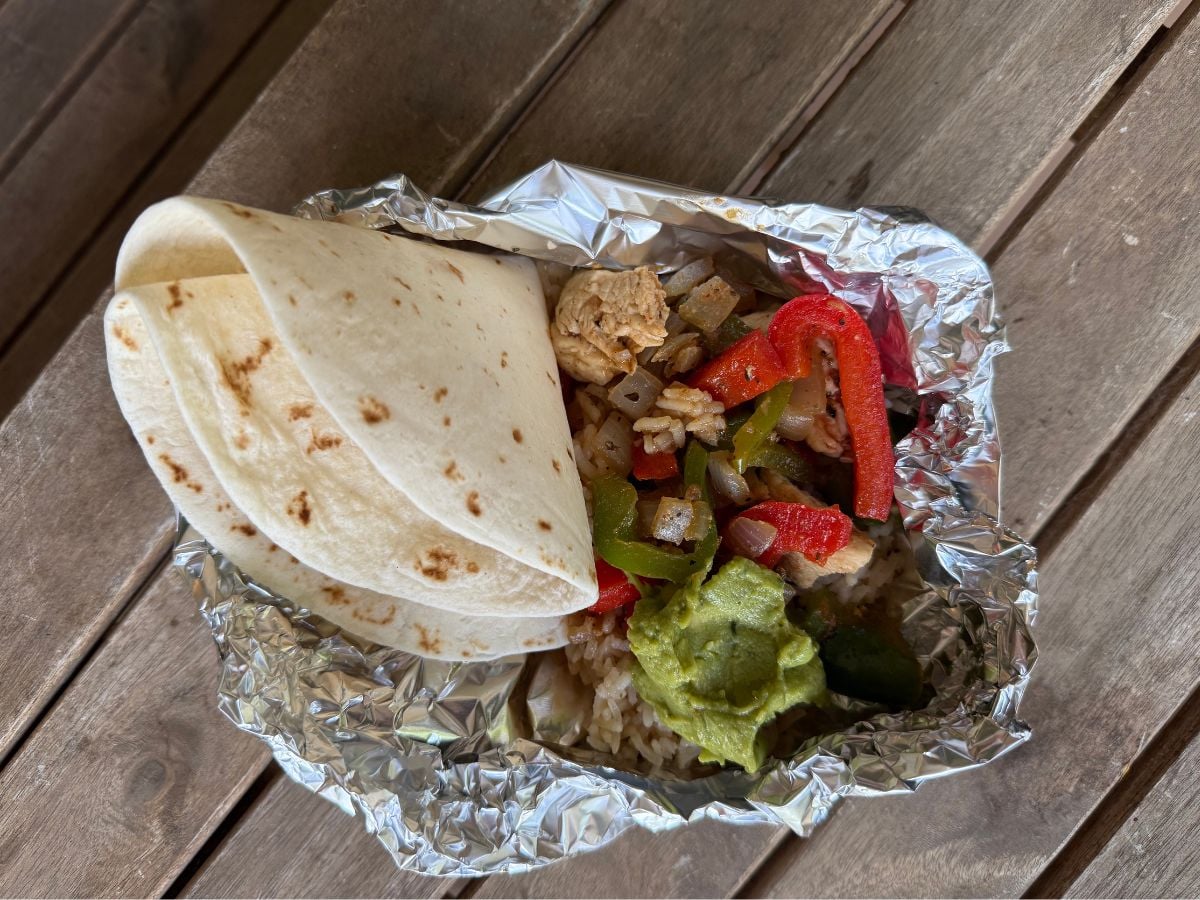
Chicken Fajita Foil Packets
1 ½ cups minute rice
1 ½ cups water
2 tablespoons taco or fajita seasoning (1 packet), divided
1 pound boneless, skinless chicken breasts, cut in to thin strips
1 large yellow onion, cut into thin strips
2 bell peppers (any color), cut into thin strips
1 bag 6-inch gluten-free flour tortillas OR corn tortillas
Guacamole, for topping (optional)
Prep at Home:
- Place the minute rice in a baggie and add water and 1 tablespoon of taco seasoning (or half a packet). Let sit for 5 minutes to allow the rice to start to absorb the liquid.
- In a large bowl, combine the chicken breast, onion, and bell pepper. Add the remaining tablespoon of taco seasoning (or rest of the packet). Mix well, making sure the chicken and veggies are evenly coated.
- Lay out 4 large sheets of tinfoil and fold up the sides, pinching to create walls. Spray each generously with cooking spray.
- Divide the rice (and any leftover liquid) evenly among each sheet of tinfoil.
- Top the rice evenly with the chicken, onions, and peppers.
- Fold the foil over top of the dinners and wrap the sides tightly.
- If cooking over a fire, wrap each packet with a second layer of tinfoil.
- Keep refrigerated until ready to cook, or keep in a cooler if you’re traveling to your camping area.
Campsite Instructions:
- Make a fire and let it burn down to hot coals. Place the foil packets on top of the coals.
- Cook for about 30 minutes over hot coals, turning every 10 minutes. (I recommend opening a packet after 20 minutes to check for doneness.)
- Let cool for 5 minutes. Open packets carefully and enjoy with tortillas and the guacamole (if using).
Sweet and Sour Salmon
2 tablespoons honey
1 tablespoon warm water
1 ½ teaspoon apple cider vinegar
salt and pepper
12 ounces salmon, cut into 3 equal-size fillets
Pinch cayenne pepper
1 tablespoon olive oil
3 garlic cloves, minced
½ lemon, cut into wedges
1 tablespoon chopped fresh parsley (optional)
Prep at Home:
- Mix the honey, water, apple cider vinegar, and pinch of salt in a leak-proof container with a lid.
- Wrap each salmon fillet in plastic wrap, then in tinfoil, and store in the refrigerator for up to 2 to 3 days, then transfer to a cooler for transporting to the campsite.
Campsite Instructions:
- Sprinkle each fillet, flesh-side up, with a pinch each of salt, black pepper, and cayenne pepper.
- Heat the olive oil in a cast-iron skillet over high heat.
- Panfry the salmon, skin-side down first, for about 1 minute. Turn the salmon over and cook for another minute.
- Turn it over again so the skin side is on the bottom, then add the garlic into the pan and sauté until slightly browned.
- Add the honey mixture and lemon wedges to the skillet and reduce the sauce. When it’s ready, the sauce will be sticky and coast the back of a spoon.
- Remove the salmon from the pan and top with parsley (if using) and serve immediately.
Day 3: Omelets in a Bag, Loaded Baked Sweet Potatoes, Hawaiian Dutch Oven Casserole
Omelets in a Bag
1 (16 ounce) package ground breakfast sausage
1 cup shredded cheddar cheese
2 scallions, chopped
12 large eggs
Salt and pepper
1 cup mild salsa, for topping
Prep at Home:
- In a medium skillet, cook the sausage over medium heat for about 8 minutes, or until it is no longer pink. Use a spoon to stir and break up large pieces. Let cool completely.
- Divide the sausage, cheddar, and scallions evenly among six 1-quart resealable bags. Crack 2 eggs into each bag.
- Close the bags, seal well, and pack them sealed-side up in a cooler right before leaving for the camping trip.
Campsite Instructions:
- Bring a large pot of water to boil over a campfire or camp stove.
- Carefully massage each bag with the egg mixture to break up the yolks and be sure the ingredients are mixed well.
- Depending on the size of your pot, carefully set 1 to 3 bags in the water at a time, sealed-side up. Keep the bags away from the sides of the pot as they boil and watch them carefully. They should be firm in about 10 minutes, but this depends on the size of the pot and how many bags are cooking at a time.
- Carefully flip the omelets out of the bag onto a plate and season to taste with salt and pepper. Serve with salsa.
Loaded Baked Sweet Potatoes
2 scallions
1 ½ cups Cheddar cheese (optional)
4 medium sweet potatoes
1 can vegetarian chili
1 avocado, cubed
sour cream, for topping (optional)
Prep at Home:
- Slice your scallions and pack in a resealable plastic bag.
- Shred the Cheddar cheese (if using) at home and pack in a nother resealable plastic bag
- Keep refrigerated until ready to use, or keep in a cooler if you’re traveling to your camping area.
Campsite Instructions:
- Wrap each of the sweet potatoes in heavy-duty foil and put them in the hot coals of your fire. Cook for about 30 minutes, turning them every 5 minutes using hot pads or tongs so they cook evenly.
- While the potatoes are cooking, heat up the can of chili in a separate pot either over the fire or on your camping stove.
- After about 30 minutes, once the potatoes are soft and cooked through, take them out of the fire. Let cool for about 5 minutes.
- Carefully unwrap the foil, slice the potatoes down the middle, and top them with the chili and avocado.
- Top with sour cream and Cheddar cheese (if using).
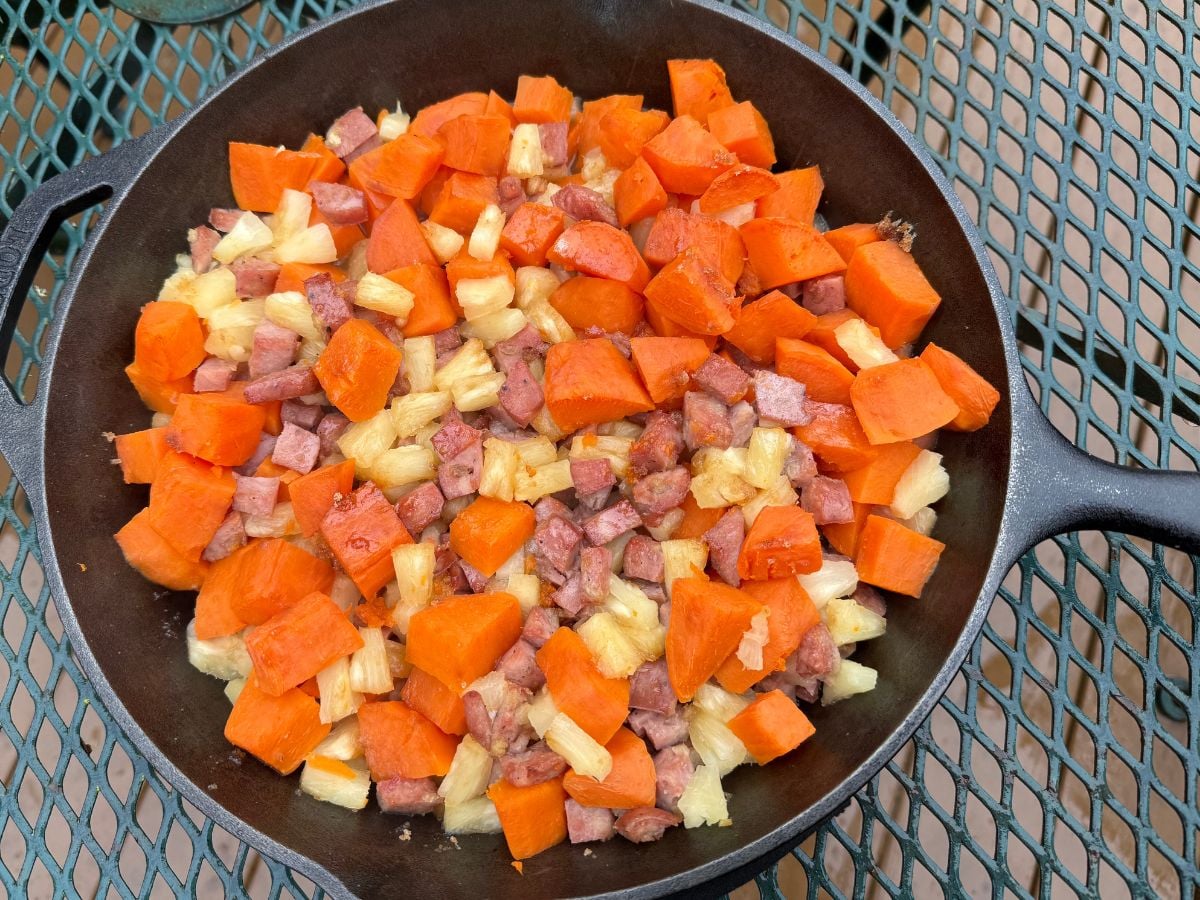
Hawaiian Dutch Oven Casserole
1 (28oz) can diced pineapple, drained
1 (28oz) can sweet potatoes
1 pound precooked chicken apple sausage, diced
4 tablespoons brown sugar
4 tablespoons butter cut in to pats
Campsite Instructions:
- Spray your Dutch oven with cooking spray or line with tinfoil
- Dump the pineapple, sweet potatoes, and diced chicken apple sausage into the Dutch oven and mix well.
- Sprinkle the brown sugar over the other ingredients, then place the pats of butter on top.
- Cover with the Dutch oven lid, then place on the grate over hot coals.
- Cook for 30 minutes, checking and stirring every 10 minutes to avoid burning.
Bonus Snacks: DIY Banana Splits, Hawaiian Cheesecake Salad, Whipped Root Beer Floats
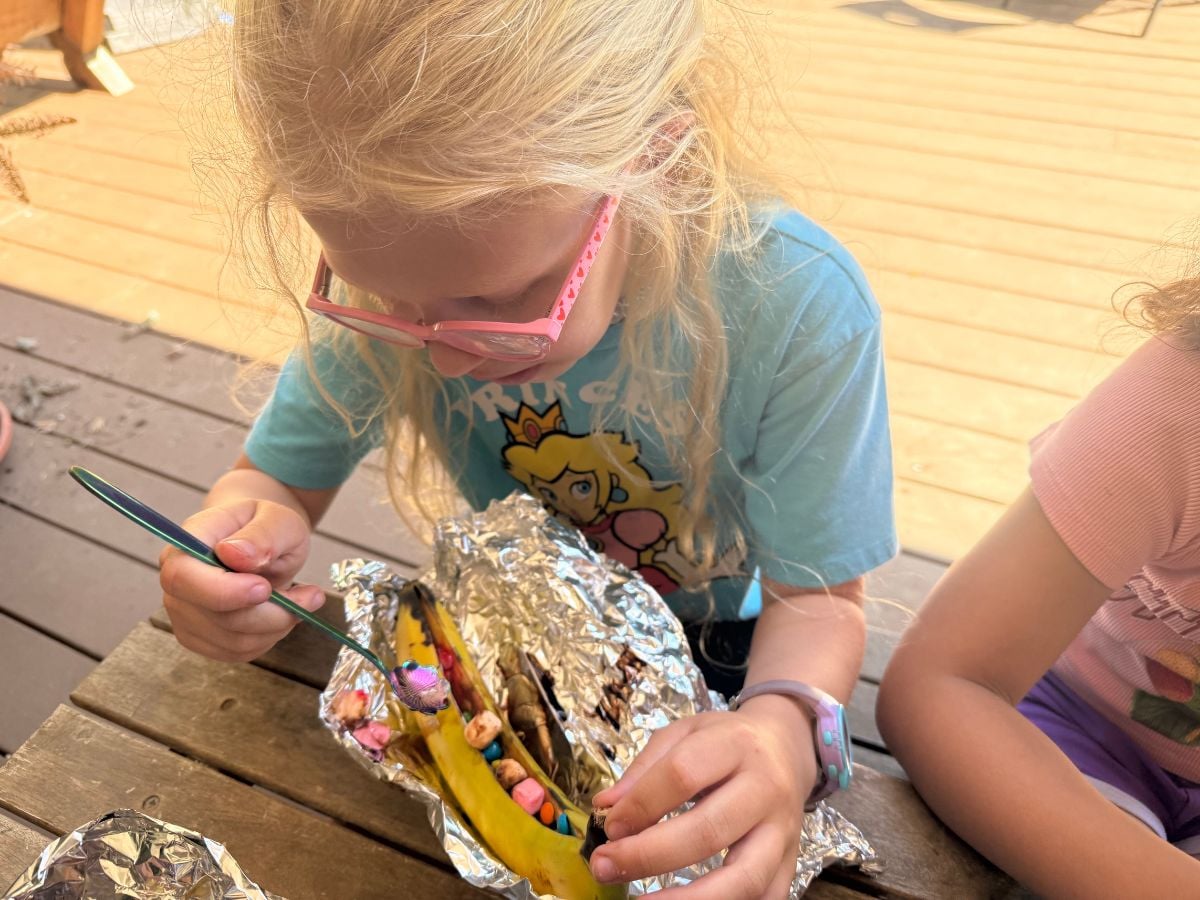
DIY Banana Splits
4 large bananas, unpeeled
1 cup mini marshmallows
¼ cup chocolate sauce
½ cup candy-coated chocolates
½ cup crushed cashews
Campsite Instructions:
- Build a fire and let it burn down to coals (this recipe will also work on a grate set over a campfire)
- Slice the bananas, still in their peels, lengthwise down the middle, so the knife just grazes the peel on the other side.
- Pull the bananas slightly apart so you have space to stuff them. Add the marshmallows in a line down the middle of the bananas. Drizzle a thin line of chocolate sauce over the marshmallows.
- Close up the bananas in their peels and wrap tightly in foil.
- Place the banana boats directly in the hot coals (or, if you have flames, on a grate set over the fire) and cook for about 5 minutes, or until the marshmallows are just melted. Open the foil packet carefully to check.
- Let cool slightly, then open up the foil and top the bananas with the candy-coated chocolates and cashews. Eat directly out of the peel with a spoon.
Hawaiian Cheesecake Salad
1 (8-ounce) package cream cheese, room temperature
1 (3.4-ounce) package instant cheesecake pudding mix
1 cup vanilla flavored liquid coffee creamer (or half and half mixed with 1 tsp vanilla extract)
1 (16-ounce) container strawberries, hulled and sliced
2 (11-ounce) cans mandarin oranges, drained
1 (20-ounce) can pineapple tidbits, drained
3 kiwis, peeled, halves lengthwise, and cut cross-wise into half-moons
1 (10-ounce) bag frozen mango chunks
1 lemon, halved
1 cup unsweetened coconut flakes
1 banana, thinly sliced
Prep at Home:
- In a food processor, or in a medium bowl with an electric mixer, pulse or whip the cream cheese until soft and creamy. Add the pudding mix and creamer and blend until smooth. Refrigerate in a container with a lid.
- In a large bowl, toss together the strawberries, mandarin oranges, pineapple, kiwis, and mangos. Squeeze the lemon juice all over the fruit and mix well. Cover and refrigerate until leaving for camping.
Campsite Instructions:
- Drain any liquid off the fruit
- Gently fold in the cheesecake mixture into the fruit. Add the coconut flakes and banana and gently fold to combine.
- Serve immediately
Whipped Root Beer Floats
1 (16-ounce) container frozen whipped topping (such as Cool Whip), unthawed
4 cans root beer, chilled
Campsite Instructions:
Scoop ½ of the frozen whipped topping into each of four large mugs or glasses. (Insulated mugs keep the drink colder longer!) Slowly pour the root beer into the mugs, and serve immediately.
Conclusion
Thankfully there seem to be more and more gluten-free options in grocery stores and many recipes can be adapted with gluten-free ingredients. Check out The Easy Camp Cookbook and Camping with Kids Cookbook for more recipe inspiration!
Let us know if you use any of these gluten-free recipes for your next camping trip, we love to hear from you!
Related Articles
3-Day Gluten Free Camping Meal Plan
© 2026, Tales of a Mountain Mama. All rights reserved. Republication, in part or entirety, requires a link back to this original post and permission from the author.