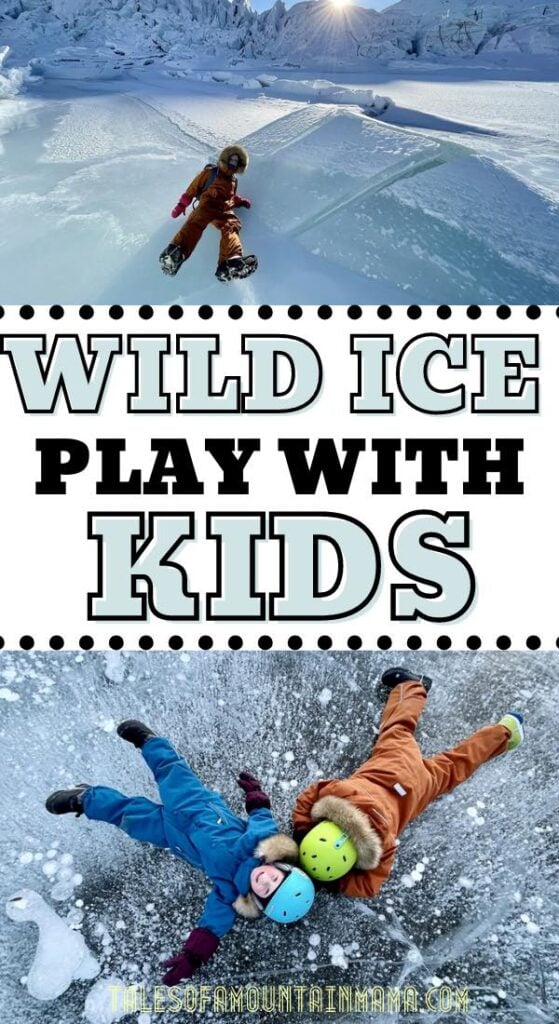
Wild Ice Play with Kids
Spending time on wild ice is always an activity that carries risk. There is no such thing as safe ice, and you should always be prepared with some safety essentials. But the times we spend out on the ice are always some of my favorite, and with some simple steps to help mitigate risk I’m comfortable having myself and my three children out on the ice.

As an Amazon Associate and member of other affiliate programs, we earn from qualifying purchases.
I am not an expert in ice saftey, I am just an ice enthusiast. It is very helpful to join local groups and be part of the discussion of potential dangers in your specific area, and if possible travel with people who know more than you about wild ice so you can pick their brains.
This article will discuss the following topics:

Ice Safety Precautions
I’m going to detail my personal rules for going out on ice with my kids. Everyone is comfortable with different amounts of risk, and I advise you to formulate your own plan. You may want more safety gear, or more likely you’ll be comfortable with less. But as is the case with even a basic first aid kit, rarely do you regret something you brought.
Go Places that you Know
First, go to waterways that are familiar. Never go out on an unfamiliar lake especially if it’s covered with snow. We stick to lakes that we recreate on in the summer, and are aware of a number of factors like the range of water depth, any streams or outlets with moving water, biotic activity (causing methane bubbles and potential unstability), and salinity content (in most climates this won’t make a lot of difference).
Do you need to have a science degree to safely explore wild ice? No! But some basic observations won’t hurt (and are fun!).

You may also find a frozen waterway and think oh great this looks like a great place to skate, and don’t realize that it’s actually a channel of a river; moving water is always going to carry a lot more risk. We never go out on a frozen river. Most deaths caused by falling through the ice happen on rivers (and most are attributed to being in vehicles or snowmachines).
There are some lakes we go on weekly, and other lakes that are popular ice fishing spots so are checked regularly, and I’m comfortable being on them even when they are snow-covered. But again, never assume it’s safe, when you go out look and listen, clear patches with a scraper and use an ice screw or do some power-jumps up and down on it (more on this below). If we lived somewhere that didn’t have consistent cold I’d be a lot more wary about venturing out when you can’t see the ice.

The particular lake pictured above is a place that we go weekly all year round. We’re very familiar with it, and the ice is usually very thick all winter long. However, this lake has a hot spring small area on the southern shore, and the ice is thinner there and we never approach it. We see bubbles from the area occasionally in summer, and in winter when the ice is thinner and is still open water in this area.
The ice gets thick enough that there are times that it is probably just fine to walk over the hot spring, but we never go on that portion of the lake because there is no reason to go there and it just adds unnecessary risk to your outing. I’d love to explore the difference in ice thickness over that area compared to other portions of the lake, but if I undertake that sort of study I won’t be towing the kids along with me.
If you’re on a saltwater pond, the freezing point is slightly different. Ocean water will freeze at 28.4 degrees Fahrenheit compared with 32 degrees of freshwater; brackish water will freeze somewhere in-between. In most environments these small differences will not have any impact.
The exception to most of the ice testing is ice that is what I’m going to call semi-wild. This is ice that your town regularly measures and maintains. We have several areas like this around here and while I still carry my ice picks mainly out of habit (and because the 2018 earthquake is still fresh in my memory), I don’t carry anything else. The ice is hot-mopped with trucks and this is about as safe as you can get on ice.
Always Test the Ice Yourself
Always always test the ice, even if you were there recently or heard it was “safe”. Inspecting can be as simple as clearing off snow and testing your weight by jumping on it, or examining the depth of ice cracks or bubbles.
You can also test ice with an ice auger or ice screw (more on that one later). We don’t really do any ice fishing but I have an ice auger because we like making ice holes, and some day will maybe get around to actually ice fishing.

Sometimes people have done this for you, and you can inspect old ice holes.

Know the signs of rotten ice. I discuss this more later as rotten candled ice can be really fun to play in and with, but it is not weight-supporting. Especially in spring this is something to be very cautious of.
Cracking of thick ice does not (usually) mean the ice is about to break; ice expands as it freezes and cracks are going to form as part of the expansion process and do not mean submersion is imminent. However, knowing that doesn’t make it any less unnerving even when you’re on over a foot of solid clear ice and you start hearing it talk to you! Some lakes are more talkative than others.
I know many adults who will go out on ice between 1-2″ thick. Under 2″ thick you’re increasing your risk considerably, and I would not go out on lakes with that thickness with kids. We go out on 2-3″ when we’re on the “pond” we play at where the water is very shallow, but on a lake I like it to be 4″.

How to Dress for Ice Exploration
Wool or synthetic baselayers are the only kind you want to wear and bring; avoid having any piece of cotton anywhere on your body. We wear wool head to toe but many wild ice skaters prefer to dress entirely in synthetics. I have heard several skaters say they’ve fallen in wearing their synthetic layers, and gotten out and kept going; the synthetics act like a wetsuit.
Wool also functions very well when wet, and will continue to insulate you. Many other natural fibers will pull heat from your body and after a cold water immersion you have no body heat to spare so it is critical that you wear layers that will help retain your warmth. A drysuit is also an option, though they are not very comfortable and are hard to find for kids.
For outer layers, wear what you’re comfortable in for how you’ll be exploring. Zippers may freeze if you fall in, so if you’re playing on risky ice wear clothes you can easily get out of if you need to change, or carry medical scissors to cut yourself out of the clothes (described later).
Carry Wild Ice Safety Gear
Always carry some safety gear. Our ice here is usually very thick, and I’m often out on ice that’s thick enough to drive a truck on. Still, it is an environment where you can die in minutes if an accident happened, and I find myself explaining almost daily to my children that no one intends for an accident to happen that’s the very nature of an accident, so I feel it’s only right to be prepared for one when we’re engaging in higher risk activities. It puts my mind at ease to be prepared.

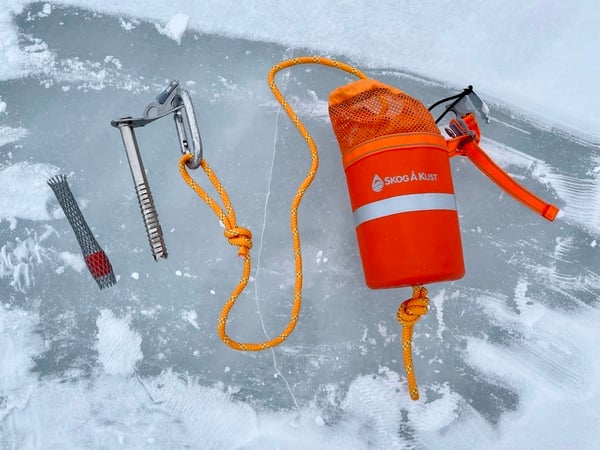
Safety gear that I consider to be essential for any trip out onto ice includes helmets if you’re skating (or for young kids even if they aren’t, a slip on the ice can cause them to whiplash themselves into a hard head-slam on the ice), and basic rescue gear. These items and the reasons to carry them are outlined below. Pictured above from the left:
- Drybag, containing reflective bubble wrap to change on (has no weight and adds buoyancy) and changes of clothes – warm wool clothes and socks, and an extra reflective blanket and emergency bivy
- Helmet (always on my head except for the photo)
- Knee Pads (*see note on these below)
- Self-Rescue Ice Picks
- Medical Scissors (for cutting gear off if zippers freeze after immersion)
- First Aid Kit (I include all the basics I’d use for (TMM Team Member Rita details First Aid Kits here)
- Garmin InReach Mini for emergency communication
- Ice Screw
- Throw Rope
- Nordic Ice Skating Poles

Helmet and Pads
Wearing a helmet and knee pads (and elbow pads and wrist guards aren’t a bad idea either) is not just for my protection, and they aren’t just because I’m a novice skater (though they absolutely help with those things too). I’m usually the only adult out with my children, and in an ideal world there would always be a second adult with us, but that doesn’t happen regularly, so I need to be sure if I get injured I can get myself back out. If I have a bad fall and hit my head, that could turn into a major emergency if I’m disoriented and unable to instruct the kids what to do.
It’s a high priority for me not to put my kids in any situations where they’d have to decide what to do without me helping them. We go over wild ice safety and backcountry safety, but I sure hope they never have to use it. And speaking of kids’ safety, kids should have helmets whenever they are on skates, with no exceptions.
Self-Rescue Ice Picks
Ice picks come in many varieties, and are an absolutely essential piece of equipment for anyone traveling onto wild ice. My ice picks were around $12 from amazon, and there is no excuse not to carry these with you. The ones I use have a coiled cord (like an old-fashioned telephone), and I either thread it through my sleeves or wrap it around my neck and around itself so it’s secure, and let the ends dangle.

Note that these particular ice picks do not float. This is fine with me, because I have them tied in a way that secures them to my body. The sharp spikes are recessed and while gripping the yellow portion (one in each hand) you claw them into the ice, exposing the picks underneath and allowing you to pull yourself out of the water onto the ice (see someone using the ice picks here).
There are many other options for ice picks. The most popular are the Zandstra Ice Claws. These float and you secure them high up by your neck. They’re said to be easy to access and use.
You can also make some DIY versions of these with dowels and screws. Because you can buy these so cheaply and they can be a dangerous item if they’re not properly secured/fitted, I don’t recommend going this route; but you can find an Instructable describing how to make them.
Throw Rope
The throw rope we use is currently unavailable, but there are tons of options ranging from $30 (Best Marine Water Rescue Throw Bag) to $65 (Mustang Survival Corp Throw Rope) and beyond. You want the bag (the part you toss) to float, and be durable material.
Longer isn’t better for this purpose, mine is 50 feet but really the shorter the better for being out with kids as you won’t be that far away from them. But 50 feet is a good multi-purpose use if you want to use it kayaking also.

You could also bring a regular rope, and tie something bouyant to one end. Make sure you tie it well, and tie a loop at the throwing end also.
Backpack and Dry Bag
I carry a backpack that fits securely, and inside it I have a drybag with gear to use in case of an immersion (or a picnic, which is how we often use it). The drybag contains at the bottom a sheet of bubble wrap. This is to step on in case you get wet and need a slightly insulated place to dress. It weighs nothing and adds some buoyancy.

Next I have some layers. I don’t usually have a full set of layers for everyone, as I don’t pack for catastrophe usually. But I have socks and some baselayers and a set of knit wool mitts and a hat that would fit most of us.
On top of the layers, and often in a separate dry bag or just in the sled, I have a small microfiber camp towel and a down blanket. Down is probably not everyone’s choice here, but we use our down blanket nearly every time out on the ice anyways and it’s lightweight and easy to pack and would help add extra warmth inside the bivy (mentioned next). We also usually bring a waterproof blanket which makes sitting on the ice more comfortable.

A heat-reflective bivy is another cheap, lightweight, small thing that is a great addition to your pack, and is what we’d get someone inside ASAP if they got wet, after drying them and quickly putting on a new layer. A small ice scraper to clear patches of ice for checking (and for play) is also a good thing to bring, the kids usually carry that.
I also have other things I carry year-round, which includes a pair of medical scissors (good to carry in case zippers freeze and you need to cut off clothing), first-aid kit, snacks and water, etc.
Nordic Skating Poles
The Nordic skating poles I carry are for checking ice thickness and integrity; they have a nice weight to them and you can drive them into the ice while skating to make sure you avoid areas of thin ice. With thick ice, you won’t come close to breaking the pole through, but you get used to how suitable ice feels and you will notice a difference should you encounter any rotten ice.

These poles are VERY sharp. They have rubber caps you can put on them and I suggest you cap them when they are not in use as they will easily rip fabrics (not to mention potential for injury).

They can also be used just like you use poles for skate skiing. They’re very helpful when the ice is bumpy or has cracks, they can really help you catch yourself from a fall. In case of a minor injury I could double pole myself back across the ice with minimal effort.
Most cross country ski poles will work for this as well especially if they have removable baskets, Nordic ice skating poles are expensive and hard to find, they seem to be out of stock more often than in stock. But if you can find them they’re wonderful to have.
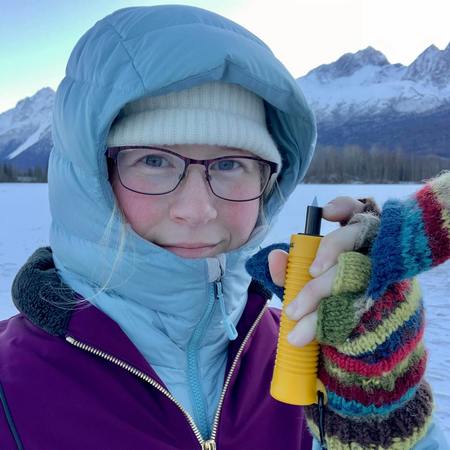
Ice Screws
Ice screws are a rather expensive climbing tool, but they can be really useful on lakes. The first thing I love about ice screws is they’re really useful for quickly checking the ice thickness (and ice quality) without carrying around an ice auger.

The other reason I recommend ice screws (and really how I justify the expense), is because I assume that if a child falls through somewhere I won’t be able to just throw them a rope and trust that they’ll grab it and pull themselves up (though with older kids it is what I would try first).

If a child falls through, panic is inevitable even though we have practiced this. So I would place an ice screw, secure the rope to it and to myself with a climbing-rated carabiner, and either slide on my stomach towards the child to help pull them out, or encourage them that help is there and to take the rope while I pull them out.

An ice screw is a large purchase, but you can place them in seconds and this is a time where every second counts.

This is a very unlikely scenario. If you aren’t on ice often, or are only out on very thick ice, you can likely skip ice screws. For me, they’re a cool tool that also give me piece of mind because of how much time we spend out on the ice.
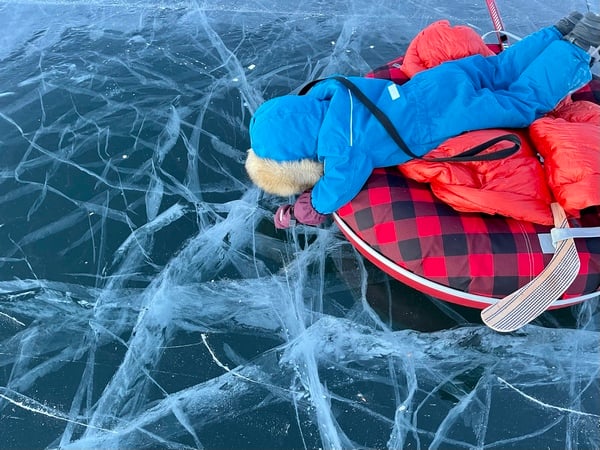
Sonic Tubes
We bring our LLBean sonic snow tubes with us on most trips out onto the ice. The potential safety benefit is not the main reason why we carry them, but they do float. I don’t think they’d provide much rescue benefit on thin ice but they do spread weight over a larger area and they’d be a safe way to slide my youngest away from thin ice if necessary.

We carry them to easily transport gear, and a tired child. They’re easy to pull across snow or ice. And my middle daughter feels safe when she has a sled close by, so it serves as a security item for her.
PFDs
Some people will feel more comfortable wearing a Personal Floatation Devices (PFDs) while out on the ice. It’s not an option I personally choose in most conditions because I’m mostly out with the kids and only explore ice that has a very low risk, but there are some situations where it may be a good idea.
We have a great list here of our favorite PFDs for kids.
If you’re ever going ice skating on questionable ice (or going long distances where the conditions may change) it’s always best practice to have a PFD, helmet, knee pads, and a full compliment of safety gear.
Types of Ice to Avoid
When we’re on the ice I’m always looking around us for any change in height, color, texture, or moisture. Clear blue ice is going to be your best bet for thick sturdy ice, and you’ll be able to see some cracks to assess depth. If you see a shiny and wet area, either avoid it or check it out slowly, testing the ice on the way over.

Here are some of the more common things to avoid, and links to more information about them (the Lake Ice site also has lots of photos of each type, and is a wonderful source of information for all things ice). If you encounter any sketchy ice, always head back in the direction you came from where you know the ice was thicker.
- Pressure Ridges. If you see a big ridge or bump in the ice, avoid it! These form between sheets of ice and because the ridge was caused by ice buckling when it came into contact with another sheet, they are not stable. If you absolutely have to cross a pressure ridge, proceed with caution and test with a pole. Then get across it as quickly as you can, with a big step or gentle hop.
- Ice Stars. Often ice stars do not need to be avoided, if they appear flat they have usually frozen solid and are beautiful to explore. If the dark parts of the ice star appear sunken, the ice will be thin and could be essentially open water in the middle of the star. The stars will thaw before the surrounding ice.
- Inlets and Outlets. This is when it’s helpful to know the body of water you’re skating on in the summer. Often these areas of moving water and thus thin or non-existent ice are obvious, but they are not always. Nearly every body of water is going to have an area like this, and large lakes will have several. It may be counter-intuitive, but skating along the shoreline is often not the best practice because of this, and because of ice’s changing volume depending on temperature which can cause heaving along the shore.
- Dark Areas. Avoid any larger dark areas. Often these are spots where the ice failed and then re-froze, and they can be significantly thinner than surrounding areas.
- Slush. Avoid anywhere the texture changes, it looks wetter, or you see slush. That slush means the ice column in that area is weak and water from the lake is seeping up, so this area is not stable.
- White Ice. Often has snow trapped in it and may be weaker.
Other ice phenomena:
- Cracks. All ice will have cracks because water expands as it freezes so it takes up different amounts of space based on its temperature. Most cracks aren’t anything to worry about, and if you spend time on the ice you’ll eventually have cracks shoot off around you. Cracks happen when it’s warming or cooling off.
- Noise. Usually this is not something to worry about, and like cracks, talkative ice can happen when it’s warming or cooling off. It’s especially talkative on a sunny day as it heats up, and on that same day towards the evening.
- Types of Lake Ice. Lake ice is fascinating.
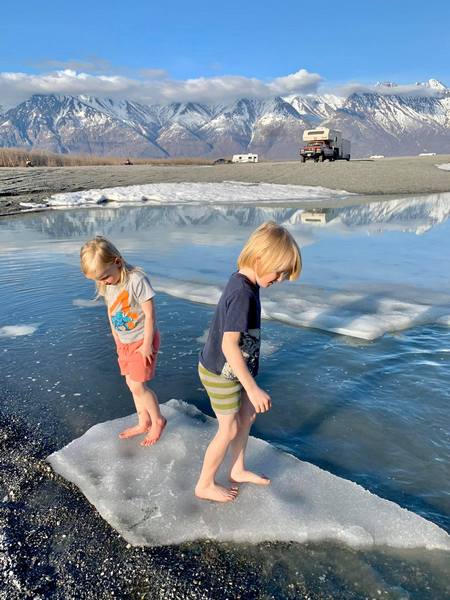
Safe Exploration Locations
If you can find places with very shallow water (more like an oversized puddle than a pond), they can allow you to safely explore ice of all depths and conditions, and get kids started on checking ice properties for themselves.

We frequent this small pond and stream all year long, and explore the overflow, slush, thick ice, thin ice, rotten ice, and icebergs.

The car is parked lake-side and the water is shallow enough to stand in. You can experience every season and stage of ice here!
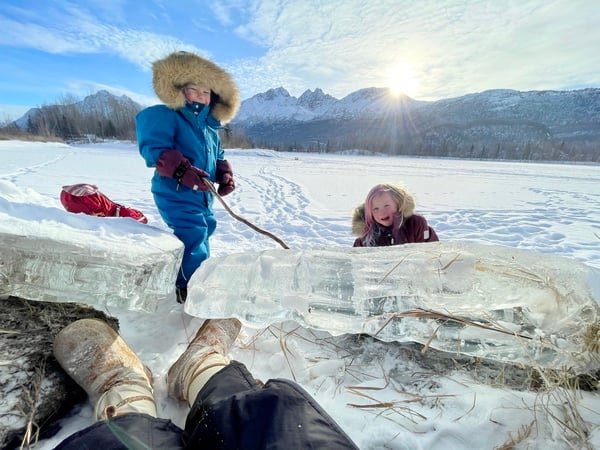
Last spring we were testing out iceburgs of rotten candled ice. They would support the kids but would not support me. Spring ice has been going through a cycle of thaws and freezes during the day and night when temperatures oscillate above and below freezing. If you want to learn more about lake ice properties and formation, this Lake Ice site is fantastic.

Rotten Candled ice also makes the most beautiful crystal sound and is wonderful to play with.

Bring a rake to grab icebergs and to chip away at them to expose the structure of the ice.

Exploring refrozen shattered ice in the fall.

Activities for the Ice
So, we’ve talked about all this ice safety, and it seems like a lot. Is it really worth it? You know my answer is going to be “of course”. There are experiences on the ice you just can’t have anywhere else.
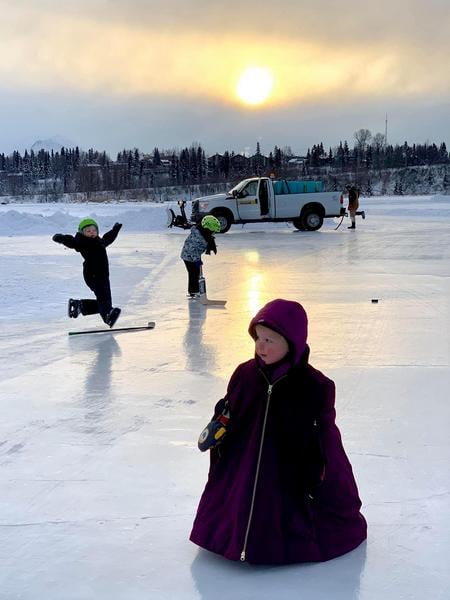
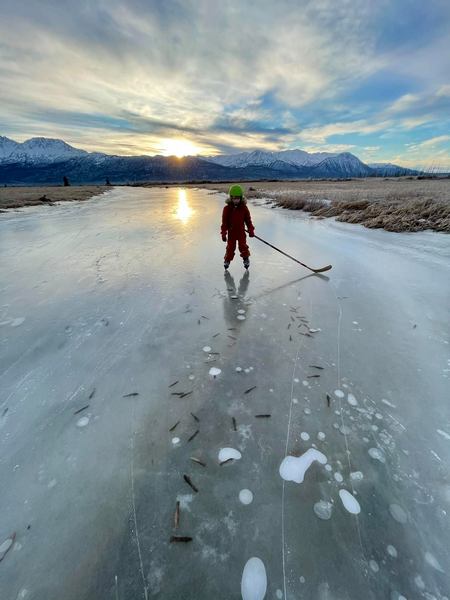
Wild Ice Skating on Lakes
Ice Skating is probably the most popular activity people do on the ice. Safety gear specific to skating includes helmets and knee pads. Because you’re moving faster, be cautious about ice that you’re skating over and if you ever suddenly encounter thinner ice always turn around and come back the way you came where you know the ice is solid.
If you’re using figure skates, remember they have almost no insulation. If your kids run cold, it will be very hard to keep them warm while skating for any length of time unless they are very good skaters (and thus, moving). Aurora Heat reusable beaver fur warmers do an excellent job at keeping little toes warm in skates.
We also find figure skates stiff and uncomfortable, so my kids have been wearing the Lake Placid Adjustable Skates. These work OK and they fit across a size range of four sizes so the value is excellent.

My son has become a really good skater and would love some quality hockey skates, but he has been borrowing my Ermine Skate Nordic skates (see below for a review and more details about Nordic skating) and they work great for him and he loves playing speed skater.
Ice Sweeping on Lakes
We almost always bring at the very least the ice scraper from the car to a lake. It’s helpful for clearing patches to check the ice, but is also great for fun. This won’t work once you’ve had many snowfalls and the snow is packed and “stuck” to the ice, but it’s tons of fun and will occupy my kids for hours.

Under the Ice Explorations
Exploring methane bubbles is something I could spend my whole life doing and never tire of. You find the most bubbles in lakes where there is more biotic activity. Dead organic matter (fish, animals, plants, etc.) fall to the lake floor and are decomposed by methane-producing bacteria.
This occurs year-round, but the bubbles get trapped in the ice in the winter. In summer, the ice will thaw and methane will be released into the atmosphere.

Looking for fish swimming underneath the ice (or frozen in the ice!), plant life, feathers… there is lots of nature that can be frozen in time in the ice. The Alaska Blackfish is one we spotted a lot this season frozen, trapped between layers of ice. This remarkable fish can often survive this freeze! It has a number of fascinating adaptations and is a wonderful creature to study.
Exploring ice is an opportunity to learn about your local ecosystem while it’s frozen in time.
Lakeside Ice
Some lakes that have what we refer to as “ice curbs” for lack of a better term. These fascinating areas can allow you to explore thick ice sheets full of bubbles and plants even after snow has covered most of the lake. These happen after the ice has initially frozen solid. Cracks develop out on the ice. Then water flows into these cracks and freezes, expanding the ice sheet again and the ice heaves up onto the shore.
Of course make sure that kids don’t wedge themselves into or under any unstable ice, these thick “shelves” are incredibly heavy. Most of them are very stable and won’t move at all when I jump on them. But be aware of recent temperature changes and look for weak spots before engaging in play underneath them.

Every week, different areas are exposed, different hoar frost has formed creating always-unique snowflakes and patterns sticking delicately out from the ice. You discover new plants frozen in interesting shapes, feel different small holes underneath the ice cubs with ungloved hands.

So go ahead, get out there and get excited about winter and exploring some ice!

Nordic Skates
I was introduced to the world of Nordic skating last year, and am a big fan. You use cross country skate ski boots and then clip on a long blade to them. The beauty of this is you can clip and unclip the blade, and still have boots to walk around on.

This functionality is helpful when you cross from skating on one creek to another, but is also great for being out with kids as there are various times that you’d love to not have skates on while helping one of them out but don’t want to have to switch out your skates for boots!
There are only a handful or Nordic skate manufacturers. Until this year, the most common skates you’d see out on wild ice were Zandstra blades. These were my first Nordic skates, and I loved them. This year, I had the privilege of being the first sponsored skater for Ermine Skate, and have found my perfect skate.

Nordic skate manufacturer’s will sell you just the blade, and you can attach your own binding. You may also purchase the binding with the blade and have it installed for you. Nordicskater offers this service and next year ErmineSkate hopes to offer it as well.
NordicSkater sells three brands of nordic skate: Isvidda and Lundhags (both come in four sizes ranging from 40cm to 55cm); and Zandstra (four sizes 40cm to 48cm). ErmineSkates are detailed below and come in three sizes, from 40cm to 50cm.
Ermine Skates
Ermine Skate makes a high quality nordic skate, and is the first skate to be produced in North America! And even better, they are made locally to us in Anchorage Alaska. The sport of nordic skating has really taken off in the last few years, but most products are still coming from Europe.
That is all changing and Ermine Skate makes a truly exceptional skate that is by far the easiest skate I have ever tried. I’m a novice skater, so on less than ideal ice my goal is usually just not to fall. I actually feel agile on these skates, and it is thrilling.

Ermine skates look similar to other Nordic options out there, but there are several notable differences.
Size Options
Ermine skates offer three different sizes: the 40cm skate that I have been testing out, a more standard-size 45cm skate, and a 50cm skate. For the average user just starting out, a 45cm is a good place to start, as it provides a good balance between speed and maneuverability, but I am loving the extra maneuverability of the 40cm skate.
When I’m out skating my children are always with me, and my goal is never speed. If you want a pair of skates you can really get up to top speed on, the 50cm will make you really happy. But if you’re mostly skating circles around your kids while you explore ice together, the 40cm is perfect.
The nose on the 40cm is a “short nose”, while the 45cm and 50cm skates have the more traditional angled nose. I’m not sure if it’s the nose, the construction, or the length, but my 40cm Ermine feel incredibly different from my 43cm Zandstra.
40cm – The 40cm skate has almost as much blade contact with the ice as the 45cm skate, but it is designed with a shorter nose to make stepovers easier and more curvature on the blade base to make it more responsive. If your idea of fun is weaving around frozen marsh canals or dodging kids at the local pond, this is the skate for you. Note that the 40cm skate does have a maximum recommended boot size of US Men’s 12.
45cm – The 45cm skate is a good all-around length that provides a wonderful balance between speed, stability, and maneuverability. The curved nose on the 45cm and 50cm skates help them ride over bumpy or cut through light snow.
50cm – Those who want to really lay out on big frozen lakes will love the stability of the 50cm. Though the 50cm skate is our longest skate, we put more curvature on the base than other brands so it still has a hint of playfulness and will happily turn.
– Ermine Skate

Bindings
Ermine skates were designed to take a wide variety of bindings, but they do not take NIS bindings. I have NIS bindings on my Zandstra skates, but Ermine intentionally wants their skates to take bindings that are installed with metal hardware, which is provided with the skates (do not use the hardware provided with your bindings). Ermine skates work with NNN, NNN BC, and SNS bindings.
Boot Size
The 40cm skates that I adore fit my size 42 skate ski boots perfectly, but they also fit my 8 year old son’s size 36 combi boot very well. They fit him so well that he has told me they are now his… unfortunately neither of us like skating on the Zandstra’s nearly as much. The nice thing is since they are so easy to clip on and off, we can trade throughout the day and have some time on both skates.

Color Options
It’s really nice to have some color options for skates! I stuck to a second pair of red skates, but you can choose from four colors. Ermine has also offered up a special addition skate that was a pink and purple gradient, and it seems like they may do more of those in the future if you’re looking for a truly unique skate!

The Bottom Line
Wild Ice will always carry risk. Using some safety equipment and being observant will greatly reduce this risk, and allow you and your children to create beautiful memories out on the ice together!

Related Articles:
- Ice Cleats for Kids and Adults for Winter Hiking
- Get Outside Every Day
- Best Puffy Jackets for Kids
- Best Winter Gear for Kids
- Surviving (and Thriving) Below Zero with Kids
Wild Ice Play with Kids
© 2022, Tales of a Mountain Mama. All rights reserved. Republication, in part or entirety, requires a link back to this original post and permission from the author.